
For our final project of the year in IDEA, we were told to make different components that make up a clock and assemble them all together in the end. We had to "use" three different machines to make these parts, so that means using different software as well. We would have all been given a clock mechanism to help power and move the clock's hands, while the students would be making things like the hands, the clock face, lettering, and any other design components to put onto the clock.
Clock Face Design
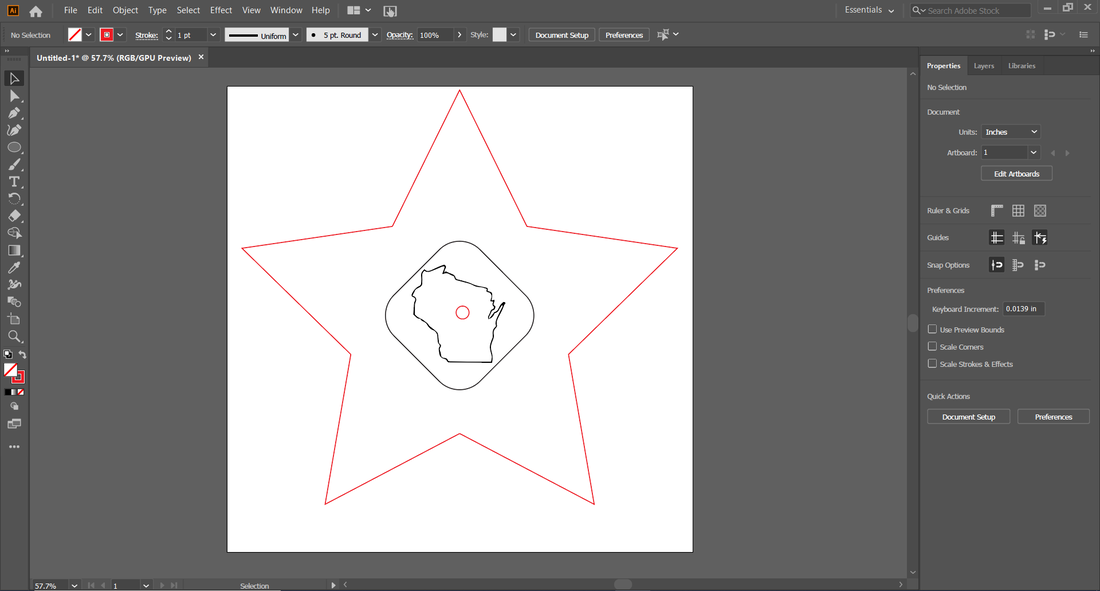
For the face design, I would have used the laser. I think that using the laser would have been beneficial in this part of the clock because you can cut out the face and also engrave designs. In the instructions for this final project, Mrs. Proctor mentioned that we should all be creative, and that the clocks don't have to just be a circle. I took that idea into consideration when making my clock. I started by thinking of what shape I could make the clock to make it unique and different from everybody else's clock. I decided to go with a star-shaped clock.
After this, I was having a very tough time with figuring out what else could make my clock stand out, so I decided to put some more engraved designs on the inside. I tried a couple of different shapes on the inside until I got to a diamond with rounded edges, which I thought just looked right. To give the clock a little feel of home, I decided to put Wisconsin on the inside of the diamond.
After this, I was having a very tough time with figuring out what else could make my clock stand out, so I decided to put some more engraved designs on the inside. I tried a couple of different shapes on the inside until I got to a diamond with rounded edges, which I thought just looked right. To give the clock a little feel of home, I decided to put Wisconsin on the inside of the diamond.
Clock Numbers
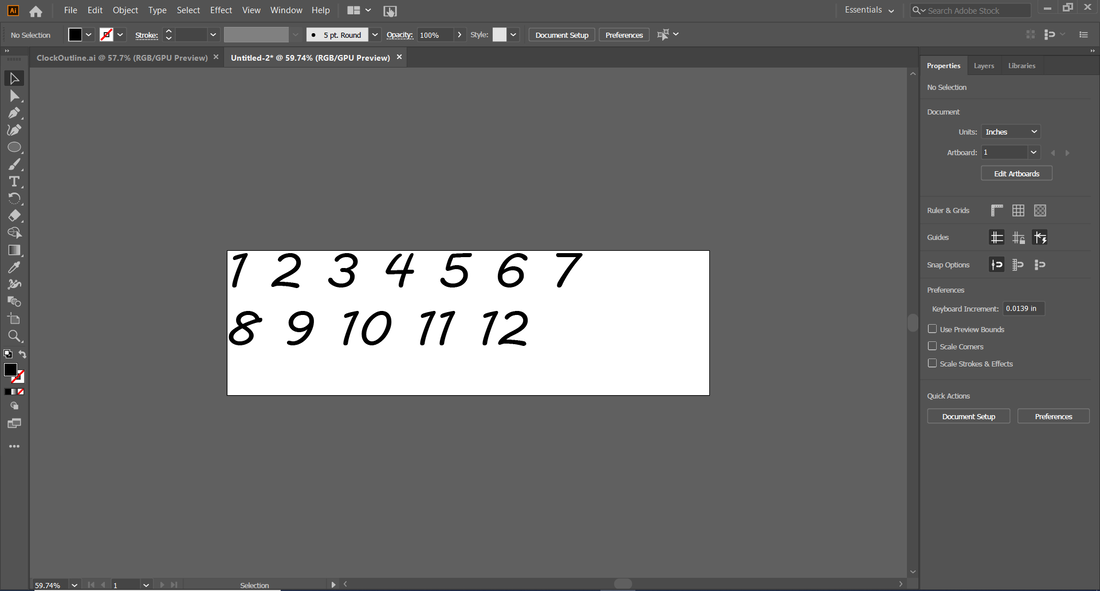
For the clock numbers, I decided to use the vinyl cutter. The thought process going into this was "what better way to create the numbers than by using the vinyl cutter!" This part of the design was not very hard to come up with, I just needed numbers 1-12 printed, and found a cool font that would go with and fit inside the clock face.
Clock Hands
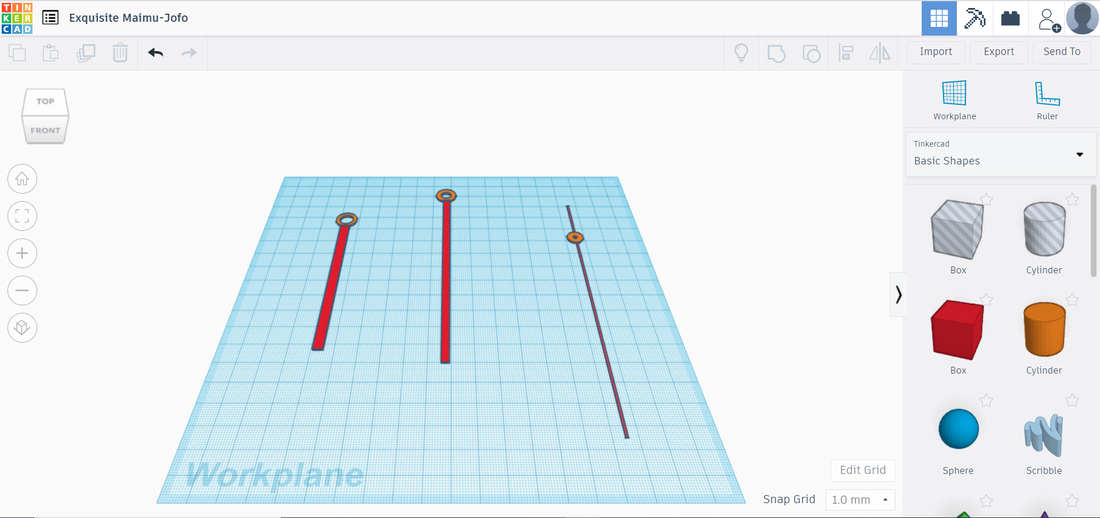
This part may have been the most problematic of the entire project. The problem wasn't with making the hands, the problem was getting the software at home. For this part, I decided that I would use the 3D printer to make the hands because it would be a lot easier to make these parts than any other way. The 3D printer needs the Autodesk Invetor software, or if you couldn't get that, Mrs. Proctor recommended SketchUp. I could not get either of them for my laptop that ran on Windows 10, for whatever reason, so I emailed Mrs. Proctor to tell her about it. She recommended that I try TinkerCAD, which worked for me, despite me not really knowing the software that well.
Making these hands, the only criteria was the size. They had to fit on the clock's mechanism which moves the hands, and they couldn't be too big. I went to work with TinkerCAD and made the hours, minutes, and seconds hands.
Making these hands, the only criteria was the size. They had to fit on the clock's mechanism which moves the hands, and they couldn't be too big. I went to work with TinkerCAD and made the hours, minutes, and seconds hands.

In the Lab
If we had the opportunity to be in the lab during this project, I would manage my time very well. I would be very efficient with all of the softwares that I would use, and get the machining times down with all of the machines.
Summary
Although it is very sad that we never got the chance to ever make some of our last projects, I am still glad that we got to do a lot of our early ones. These projects that we actually performed in person gave me a better understanding of all of the softwares that we used, and it was fun to learn how the machines worked and what they did. IDEA was a great class this semester in a field that will always have a lot of interest in.
