
What is Illustrator?
Adobe Illustrator is a software that is used for creating drawings, illustrations, and art on a computer. Illustrator is a very widely used software used by many graphic designers, web designers, artists, and professional illustrators to make very high quality artwork.
Illustrator and the Laser
|
|
Making a Keychain
Step 1: Make the Illustration
|
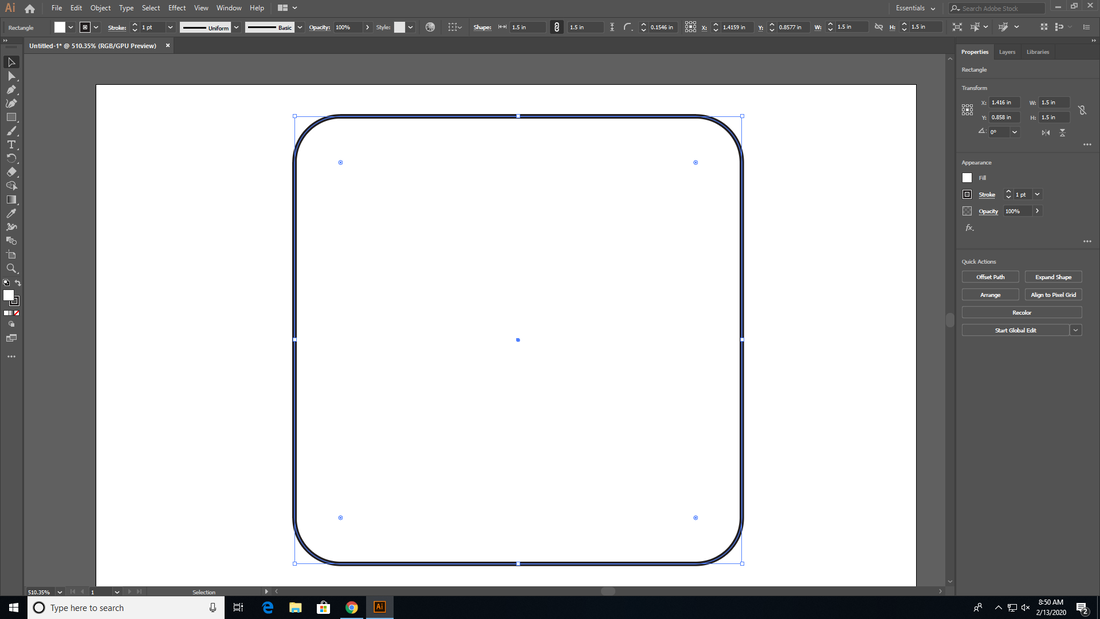
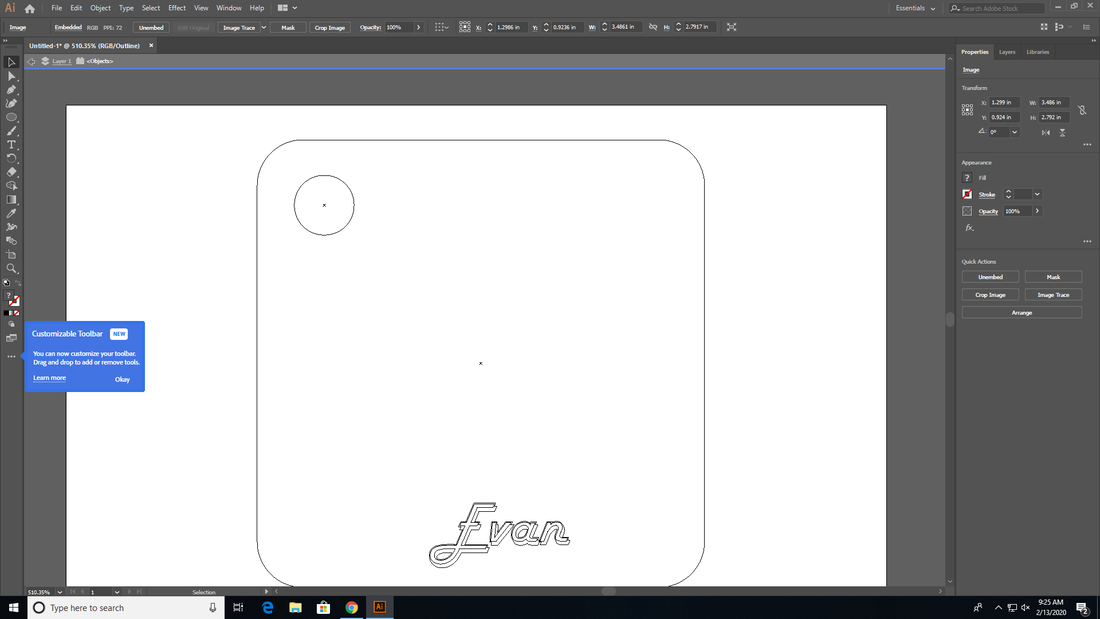
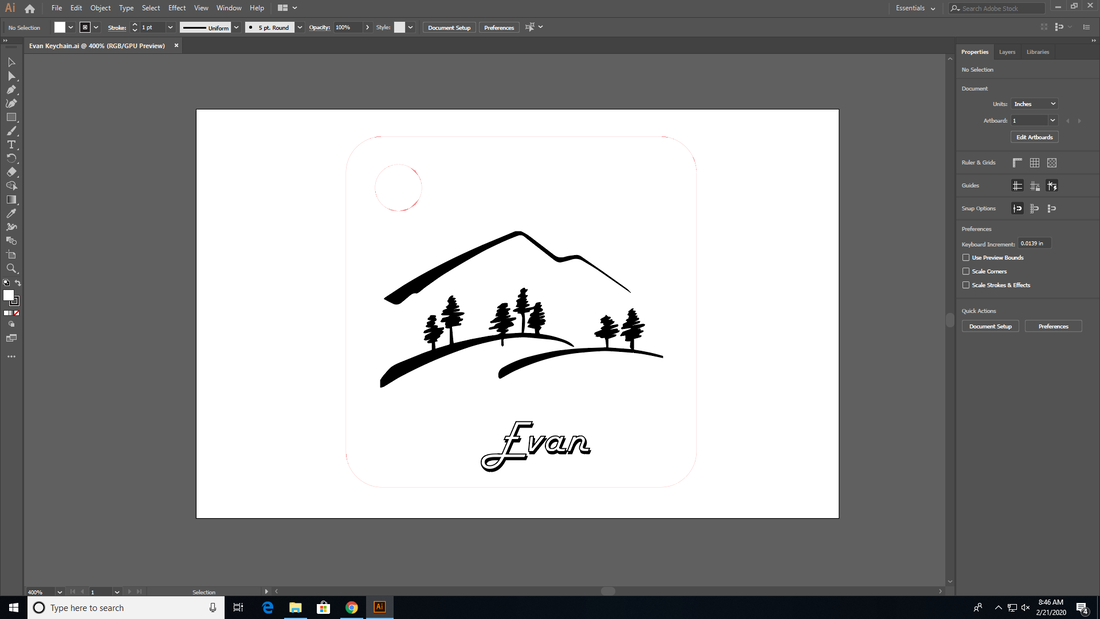
First, you will need to make the illustration. You are going to make sure that your outline is within 2.75" x 1.75" in a landscape orientation. Make sure that you are in RGB (color). Use the shape tool to create a square within your artboard. You can make the corners rounded if you want them to be rounded by dragging in the corners. Next, you need to select the outline that you have created and make it red, and reduce the size to .0001. This will make sure that the outlined square it cut out of the plastic. Next, go back to the shape tool and select an ellipse. Use this to place a circle in one of the corners of the red square, also making this .0001 and red. If you want text, you can select the text tool and put in whatever text you want with whatever font you want. You will select the text and create outlines, this will make the text into vectors and paths, making it able to engrave.
|
|
|
Step Two: Prepare the LaserAfter you have uploaded the illustrator file to a hard drive, you will pick out the piece of plastic with the desired thickness that you want. You will measure the thickness of the plastic, open the laser software, and put that thickness into the software. Make sure the exhaust is on! Now, you can place your plastic in the laser, and use the focus tool to make sure that the edges of your design are within the plastic. You can use the relocation tool to move your design within the software.
|
Step Three: Sit Back and Watch!Once you have your plastic and design on the software all lined up, you can now begin to print! Click the green play button on the software, close the clear hood, and sit back and watch your keychain being created.
|

|
Finished Keychain

How to Apply a Vinyl Decal
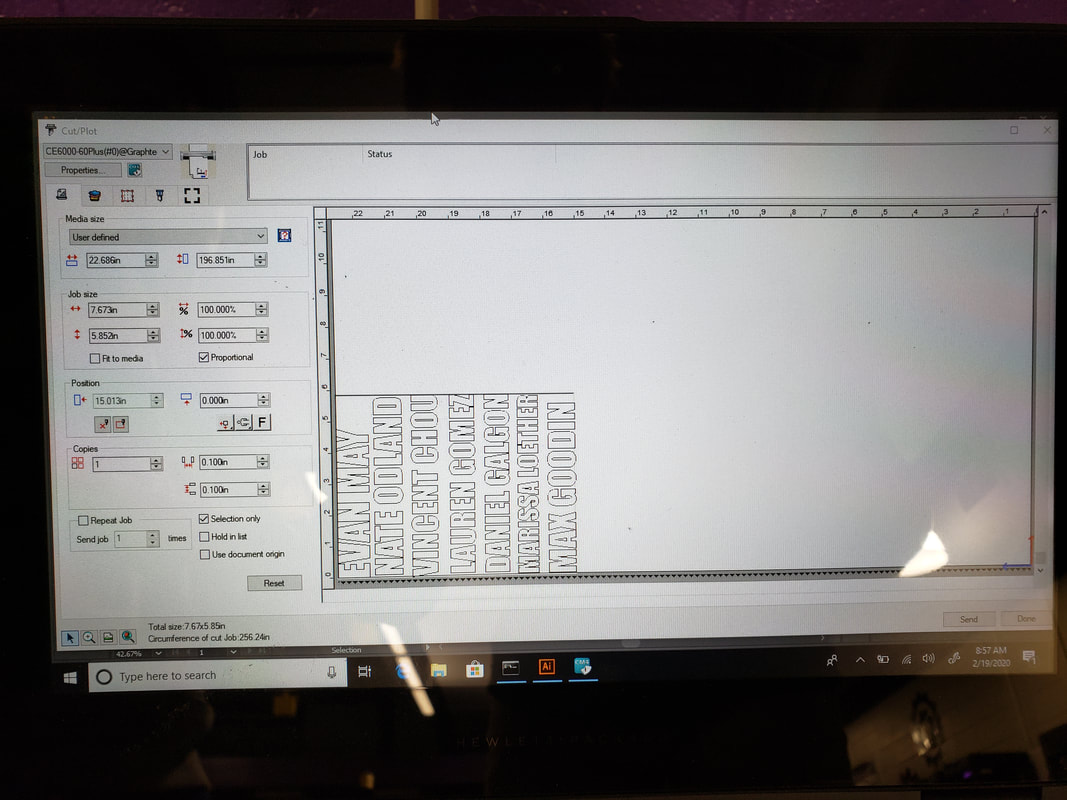
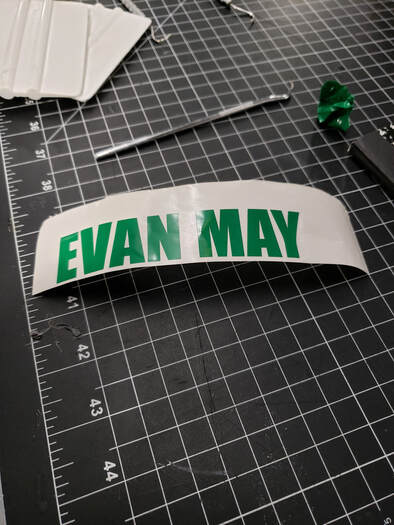
Step One: Print the Vinyl CutoutFirst, you will want to lay the print out in Illustrator and make sure that it is ready to be printed.
|
|
|
Step Two: Cut out the Desired Letters/FiguresNext, you will want to cut out the letters/figures that you want from the rest of the vinyl sheet. Keep the rest of the vinyl so that it can be reused. Next, you will want to weed out all of the pieces of the vinyl that you don't need, the stuff around the letters, using dental tools.
|
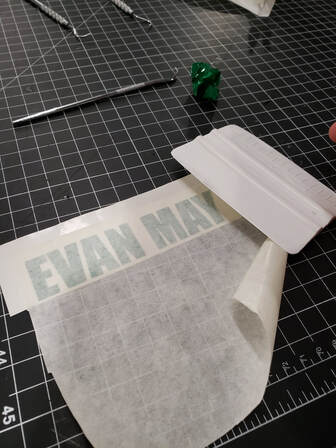
Step Three: Move to Transfer TapeThe next thing that you need to do is move the vinyl to transfer tape. You need to cut out a good piece of transfer tape that is the right size, then put that tape on the front side of your vinyl. Next, use an applicator to press down the transfer tape to make sure that the vinyl sticks to the transfer tape.
|
|
|
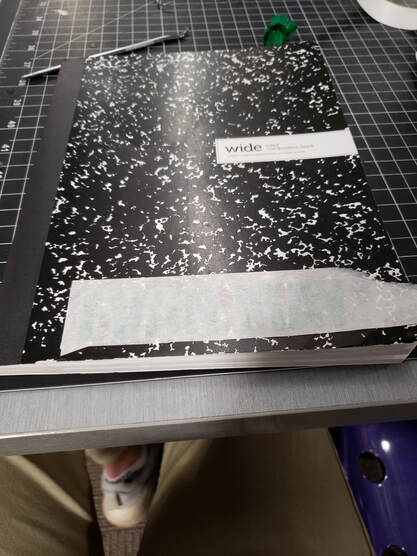
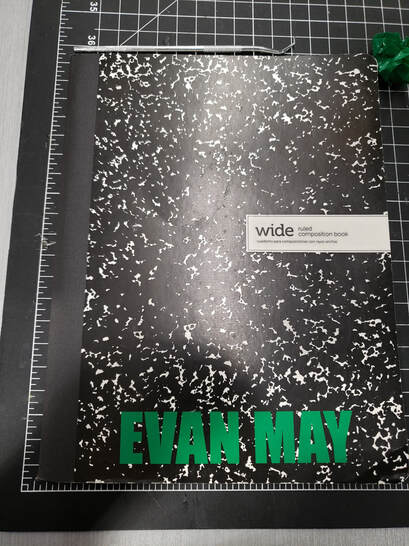
Step Four: Apply to NotebookOnce the tape is on, peel off the backing from the vinyl. Now you are ready to put the vinyl on the notebook. Put the lettering on the desired location and press down. Use the applicator to make sure that the vinyl is on tight before removing the transfer tape. Peel the transfer tape very carefully and make sure that it does not remove any of the letters.
|
Finished Notebook
What I Learned
Coming into this, I had no knowledge of how to use Adobe Illustrator. I am very glad I learned at least a little bit about how to use the program because it was very useful to make some pretty cool things. I also learned how to use the laser to cut out plastic and learned how to make vinyl decals.
